Arno's Megane RS2

here we go: engine cover off:

g5xc.jpg

removed the shield, lambda sensor and attach turbo / catalyst:

do3y.jpg

removed the under motor hanger, gear oil drained and removed the right axle shaft:

6p5j.jpg

removed the axle shaft bearing block and the catalyst already pulled out:

uc9t.jpg


removed the middle silencer:

h5xk.jpg

before that, cut the pipe between middle and last silencer:

zw68.jpg

last silencer also removed:

uue1.jpg

and now to the install of the mrs3 n4 rally exhaust system.
downpipe fixed to the turbo,install the lambda sensor and plug in:

mkck.jpg

0por.jpg

without the original catalyst, there's a lot of space:

ctin.jpg

o5hm.jpg

mounted the right axle shaft, some brackets and filled in the gear oil:

ypsx.jpg

mounted the shield from the top:

7lg2.jpg

mounted the cover, finish from top:

8vhf.jpg

mounted the middle pipe with silencer and metal cataylist:

xeql.jpg

mounted the rear pipe:

9x3n.jpg

because the second lambda sensor is mounted further back,
I have made a plug&play extensions cord with original connectors on it:

igyj.jpg

near the gearbox reconnected:

gq78.jpg

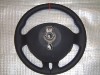
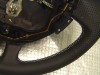
past the steering gear:

x7w7.jpg

clipped in the original conductor holder:

mxcy.jpg

to the second lambda sensor:

h8yg.jpg

the hole mrs3 n4 rally exhaust sytem fits perfect. also the tailpipe fits exactly in the middle of the carbon cover without adjustments:

55lm.jpg

finish:
from the outside it looks nothing. only small hints point to something other sound and performance:

j148.jpg

vrll.jpg
 
Project: MRS2: Water Intercooling & elec. Pop Off Steering

a small gimmick:
first system:
because the cleaning I no longer need the headlight cleaning system.
therefore I have the system used for a water cooling of the intercooler, and it's controlled depends the boost pressure.
so the water consumption is kept within limits.
second system:
electrically switch between original pop off valve and the open hks pop off.

regulatory strategy:
the hks pop-off can be operated alone, or in combination with the water cooling of the intercooler.
but in return, the water cooling not alone.
the immobilizer diode still blinks as usual. of course, also at ignition off etc.

here shown in pictures:

system off / original pop off valve active:

Gx8t9y.jpg

jxj2TB.jpg

hks pop-off active, original pop off valve inactive & intercooler water cooling off:

DGizG9.jpg


hyDrf1.jpg

intercooler water cooling on / standby & hks pop-off active, original pop off valve inactive:

oHCVjH.jpg

glUPKe.jpg

intercooler water cooling active & hks pop-off active, original pop off valve inactive:

LkYByK.jpg


4RlhZl.jpg
 
Youtube

[video=youtube;OSfiUajCJpU]https://www.youtube.com/watch?v=OSfiUajCJpU[/video]

[video=youtube;tItTHdotidg]https://www.youtube.com/watch?v=tItTHdotidg[/video]
 
Project: MRS2: Conversion Alpine / Apple iPod Multimedia

needed parts:

IhGtEq.jpg

Ipod classic 6.5g 160gb, anthracite, engraved for the provided field of application (is used only for in / the MRS2):

nDeHaC.jpg

PDGIOo.jpg

CEKpir.jpg

navi antenna lengthened and soldered on mass:

XZvqBX.jpg

also the radio antenna, and additionally split for tmc:

oKhYhX.jpg

hidden install, and yes, reception is here:

itcPgF.jpg

mike the freisprechanlage also elongated to mass / provided with receptacle,
and fitted into the sun visor holder, and yes, you understand me best:

rcQjjz.jpg

vcPHjQ.jpg

V4t4He.jpg

display from the CRS3, otherwise it works (the original cabasse display) not with the alpine interface:

1Hggt0.jpg

Orwwj5.jpg

specially prepared ipod console for the center-fold:

WBnsKp.jpg

LIQe1r.jpg

MV5iHX.jpg

all the required line rates elongated to mass, so that it also comes behind almost like original:

9VbcF5.jpg

double din frame adapted / painted high gloss similar to the oem look:

ZMk3SE.jpg

JQ4fVj.jpg

4Oqzuv.jpg

in it, and without bungle:

XhCN2L.jpg

43Fa6r.jpg

the original cabasse system completely removed, incl. the unneeded antenna cables,
and the right car boot cover exchanged with a "basic version", also a need for the following car audio installation, finish:

CJZTsz.jpg

fdb7T6.jpg
 
Project: MRS2: Conversion Quaife ATB & Metal Catalyst

all needed parts:

9ABeWP.jpg

removed from above:

nYWnTm.jpg

also from below:

Ahh7mS.jpg

already out:

Gba9o1.jpg

fRkyf1.jpg

fixed on the holder:

nOKUOZ.jpg

dissembled is fast:

AVIeSg.jpg

wZc4tC.jpg

unpacked the ATB, unscrewed the crown:

DxDHle.jpg

JzaFFk.jpg

mounted new bearings, screwed the crown:

WZYR8W.jpg

ELmLp7.jpg

inside and is already turning by itself:

zauRQs.jpg

mounted the other parts:

BZRQDA.jpg

all cleaned, apply the sealant and mounted the cover, mounted the outer parts and ready to install in the MRS2:

RKeAad.jpg

qfhvqT.jpg

back into it:

IuJ9Nf.jpg

all mounted from below:

GHddFn.jpg

also from above:

4W1leJ.jpg

U17hAw.jpg

again a familiar image:

Hy1ngG.jpg

finish:

XFsCGh.jpg

not to forget to fill in the lifetime warranty card and send it to quaife:

EoXno9.jpg

at the same time installed the metal catalyst:

yet installed here, space completely filled:

SaIZYu.jpg

without mounted gearbox and front axle, very easy to dissamble:

oUobJM.jpg

conversion both lambda sensors:

f1pzpg.jpg

mounted the metal catalyst and it remains very much space:

walrcO.jpg

from above also all good. all connections are in the right place:

f75GAk.jpg

mounted the shield, looks like original, finish:

dyUMmo.jpg
 
Project: MRS2: Conversion CRS3 R27 Seats

test mounting:

D6SQhr.jpg

dissemble:

MXcOQp.jpg

parts painted:

NQye6F.jpg

rz6iJt.jpg

all mounted without cushion:

vGe1Py.jpg

dGzgeH.jpg

a part of the perfect fitting leather to the rest of original leather of the MRS2 brought to perforate,
and then inked the hole-edge by hand (two zones per seat have two-tone perforated leather):

l2s01I.jpg


"Renault sport" lettering adapted to the mRS2 version and further added "megane trophy":

DvytpL.jpg

and below "recaro" replaced with the serial number:

DXEZfQ.jpg

fitted the seat harness from the megane with seat heating etc.
now you can replace the seat as plug & play:

eQAB9y.jpg

8la1uT.jpg

291VFB.jpg

7KrEQS.jpg

2jymtb.jpg

of course the heated seats is also works as original:

zMzZ6S.jpg

and so they look now:

kEaPFT.jpg

lYzTHV.jpg

tg7ARu.jpg

WKqPK9.jpg

UqrqdU.jpg

1Gwmwj.jpg

9MuNkX.jpg

PHPzKa.jpg

wkJs5U.jpg

AkVsaK.jpg

EwiP2Z.jpg

62jp2o.jpg

IXT5Fr.jpg

and mounted, finish:

viJhZ8.jpg

mEPnPm.jpg

c2xdLa.jpg

STF9zA.jpg

A6YArw.jpg

q6B8p6.jpg
 
Project: MRS2: Full Integrated BPC2 Chip & Mapping Selecor

BPC2 Chip, program cable for the laptop, placebo-plug (if bpc2 should stay away):

Ta77wt.jpg

BPC2 Chip engine harness:

cLCxlG.jpg

BPC2 Chip mapping selector harness (prototyp):

d8O3Sz.jpg

greater injectors:

0EFHWv.jpg

headlights bright wide adjuster on the left for the BPC2 mapping program selection
(I have xenon, therefore I don't have it in as original):

N4BqY3.jpg

not used harness and connectors in the e box in the engine compartment:

xKrMOH.jpg

here the other ends comes out in the interior:

ueLPuZ.jpg

8DZyWD.jpg

made a new harness and supplemented with the com connectors of the BPC2:

445Igb.jpg

ykF56f.jpg

ykF56f.jpg

connected with original harness, where ends in the engine compartment:

hqovQy.jpg

ngpbvp.jpg

T5Addo.jpg

the BPC2 Chip mapping selector harness goes also to the dashboard instruments (with not used original cables),
to show there, which mapping program is chosen (follows later):

rjiJyz.jpg

here the used original harness to the headlights bright wide adjuster, now mapping selector:

1JBu3M.jpg

fitted the carpet again, the two com connectors end in storage compartment in the driver foot space.
the BPC2 Chip is easy to operate now, and isn't in the engine compartment as normaly:
so easy as to dock and undock an ipod:

QqLCs1.jpg

IkeSf5.jpg

mounting an original Renault connector on the BPC2 harness:

OReWzF.jpg

connected to the original harness in the e box, and the rest to the motor electronics periphery:

Gvb4S6.jpg

dixepV.jpg

changed the original injectors with the greater:

adlhMl.jpg

zILBx5.jpg

F7CdsJ.jpg

3mUzRw.jpg

qHNXBv.jpg

connect the latest pins to the headlights bright wide adjuster connector and mounted the switch unit:

3QbWMD.jpg

positon 4 I have mecanical blocked, because the BPC2 Chip has 4 program places:
0= original / 1-3= various mappings:

N02q2g.jpg

how I incidentally change and write the plans, it looks to me like this, finish:

83BjW8.jpg
 
Project: MRS2: Conversion CRS3 Steering Wheel

...meanwhile, there are nicer original steering wheels from renault as the mrs2 version.
thus comes the version of the clio 3 rs in my mrs2. nice grippy and shaped, and somewhat smaller.
airbag and cruise control buttons fits without problems:

14Py2Z.jpg

shade of plastic and leather and the grain and perforation of the leather would fit well in the interior of the mrs2.
the red center mark would just go still like that. but unfortunately, the light gray stitching and silver plastic parts don't.
thus, from an initially thought "mini project in between", which can run within a day, to one, for the final result, rather more complex project.
in terms of time, until all ingredients are far, in any case...

parts concerned:

ThMeVX.jpg

REA9yf.jpg

bQTOYV.jpg

frwBYT.jpg

fair, also a new gearshift lever:

YUqGhp.jpg

and these parts must first go to the paint shop.
the inside door handles also, because they are / were the only remaining parts in silver in the interior:

ZqlsOc.jpg

gloss black is called for, so it fits perfectly to the interior:

KjvlXN.jpg

TW8to7.jpg

orA99z.jpg

2HSTup.jpg

K0UoAv.jpg

and yes, instead of the originally "renault sport" now "trophy". of course in matching RAL code:

EPeJCf.jpg

the steering wheel is back from the saddler.
middle marker in orange leather, the holes of the perforated leather not dyed in orange (too much):

x3x41M.jpg

hYdV8E.jpg

m77MxD.jpg

ubOdkq.jpg

perfectly matching orange leather pieces found, not self-evident:

M6gr77.jpg

original parts removed:

LFTUXZ.jpg

airbag module removed:

IGMBXO.jpg

the connections from the buttons and the bugle unplugged and the original steering wheel removed.
the clio 3 rs steering wheel mounted (plug & play):

4P4YSn.jpg

All connectors and pin assignments fit without modifications:

VvBtCS.jpg

the trophy cover also attached:

lGsKaO.jpg

airbag cables plugged in, airbag module click in:

dqvUnv.jpg

sake of fair, in addition a new gearshift knob installed:

9MjPmO.jpg

finished:

HhccY8.jpg

then test drive, cruise control and bugle tested - works. airbag indicator light stays dark.
 

Attachments

  • 14Py2Z.jpg
    14Py2Z.jpg
    30 KB · Views: 0
  • ThMeVX.jpg
    ThMeVX.jpg
    97.1 KB · Views: 0
  • REA9yf.jpg
    REA9yf.jpg
    58.8 KB · Views: 0
  • bQTOYV.jpg
    bQTOYV.jpg
    71.7 KB · Views: 0
  • frwBYT.jpg
    frwBYT.jpg
    72.6 KB · Views: 0
  • YUqGhp.jpg
    YUqGhp.jpg
    53.1 KB · Views: 0
  • ZqlsOc.jpg
    ZqlsOc.jpg
    99.5 KB · Views: 0
  • KjvlXN.jpg
    KjvlXN.jpg
    73.4 KB · Views: 0
  • TW8to7.jpg
    TW8to7.jpg
    52.8 KB · Views: 0
  • orA99z.jpg
    orA99z.jpg
    44.6 KB · Views: 0
  • 2HSTup.jpg
    2HSTup.jpg
    47 KB · Views: 0
  • K0UoAv.jpg
    K0UoAv.jpg
    57.3 KB · Views: 0
Project: MRS2: Conversion Optima Red Top

fits without problems:
- pole connections
- fuse box
- cable lengths
- holder thick on the ground battery / attachment
- bonnet closes

EUkTVn.jpg
 
Project: MRS2: Conversion Brake Calipers // Trophy Look

small project in between:
same look as the MRS3, now also here for the MRS2:

img7666z.jpg

dsc0048vfb.jpg

dsc1176xo.jpg


also new brake discs and pads:
of course, the trophy lettering will be the same as on the steering wheel cover:

EPeJCf.jpg

here we go:

17y5.jpg

qbv8.jpg

expansion of the pads and discs:

ukn0.jpg

yj8b.jpg

mounted the new discs:

0sio.jpg

ux5k.jpg

brake calipers decompose, cleaned and brought to glass bead and be right back:

gpk5.jpg

yquc.jpg

u77j.jpg

fetched from powder coating and just brought to the screen printer:

06z2.jpg

rfPsEj.jpg

m9ln.jpg

1qr3.jpg

fetched from the screen printer and back to the powder coating.
now it will be even powdered transparent:

KZt9SB.jpg

6WbGVy.jpg


c3M1IK.jpg

fetch from the powder coating, mounted to the MRS2 and vented the brake system, finish:

uo6v.jpg

uedt.jpg

TXMXPi.jpg

nv8b.jpg

y37v.jpg

0m0m.jpg
 
Project: MRS2: LED Daylight into Fog Lights

installation integrated into the original engine harness (only one cable new), and a new connector:

u6dl.jpg

these accessories lamps aren't flush enough to the bumper recess. doesn't look like oem:

qgm1.jpg

therefore an adjustment is necessary, and I modified the holder:

2npn.jpg

reduced by 12mm:

cjpz.jpg

grind in from and restore the holder:

b41f.jpg

fits:

qi82.jpg

pre-drill and screws in it:

u8e9.jpg

control unit also in the bumper:

nlni.jpg

works, flush as oem, happy, finish:

zstn.jpg