Clio 197 Track/ Race Car Build

karbonCup

Paid Member
Well... after just checking when I originally signed up on here, it states 2011. Wow.. So it has taken me 4 odd years of lurking and deciding to buy one and now I finally have myself a Clio 197, still preferring the front end to the 200 (sorry 200'ers) ;-)

Its Purpose - Track/ Ring Tool.


My history with cars once touched a french car previously (Citroen C2 VTR) many moons ago and after the problems I was left throwing 4 figure pound notes at it, it had to go as the issues still couldn't be resolved.

Since then I haven't owned another as I have always given them the same problematic stigmatism and poor build quality, which Im sure most will agree with French cars. However the exceptions are made with Renault Sport cars and what great cars they have been too. A small part of me has always given them the greatest respect and to now own a 197 I feel complete. Have always had a soft spot for the 197/ 200 Chassis, especially when being greeted by one on track, more so at the Ring watching them dance & shimmy round corners.

Not really done a build thread before with any car but can see myself giving a lot more of my time with this than anticipated! So expect a few pics along the way.


My Clio 197 was purchased as an already semi-stripped, half built and pretty standard 197 made for track use but I saw passed all the present workmanship and mods as I have always had a clear vision of where I would want it to end up... However that has now changed again since driving it (having never driven a 197 prior to buying believe it or not).

My aim is now a lot higher than originally predicted to improve on its already excellent and potential chassis.

I look forward to working and learning a new car/ chassis welcoming it within my fleet.


To be continued...
 
Last edited:
3 months in on the build and the main bulk of the work has been done but still a way to go yet.

Waiting remaining parts to arrive from all round Europe at the moment.

Few pics to show progress...
 
First thing I did was fully strip the car as it wasn't to my standard as an already semi-prepped tracked Clio RS.


All Tar insulation panels and patches were removed.

IMG_7873.jpg

IMG_7882.jpg


IMG_7858.jpg

IMG_7876.jpg

IMG_7887.jpg

IMG_7905.jpg


IMG_7895.jpg

IMG_7899.jpg

IMG_7902.jpg

IMG_7900.jpg
 
Last edited:
12kg, decent chunk saved. How long did it take you to do that? Thinking I might do it then chuck the carpet back in over the top? :001_unsure:
 
12kg, decent chunk saved. How long did it take you to do that? Thinking I might do it then chuck the carpet back in over the top? :001_unsure:

12KG for just a fraction of what I have removed in total but yes its quite a saving on just the tar insulation. The roof panel was the majority of the weight, circa 6+KG at a guess.

Took a while yes (5hr or so) but was crucial to remove prior to primer & painting. Heat and a scrapper being careful not to scrap too hard on the roof as score lines can be see on the outside followed by Autosmart Tardis to remove the excess.
 
On to removing the dashboard....

IMG_8349.jpg


Removing the remainder Foam sound deadening located under drivers & passengers footwell and behind the dashboard which couldn't be reached. Doors panels removed at the same time:

IMG_8358.jpg


Unwanted brackets and bits also cut out the back seat and boot area. +/- 5KG
IMG_8290.jpg

IMG_8355.jpg


IMG_8359.jpg

Airbag removed:

IMG_8360.jpg

Just under 3.5KG saving:
IMG_8361.jpg
 
Last edited:
Backbox exhaust mount hangers changed as routine maintenance. Part Number: 8200444058.
They looked out of shape and passed their life expectancy:
IMG_7831.jpg

IMG_7832.jpg


IMG_8383.jpg

IMG_8385.jpg
 
12KG for just a fraction of what I have removed in total but yes its quite a saving on just the tar insulation. The roof panel was the majority of the weight, circa 6+KG at a guess.

Took a while yes (5hr or so) but was crucial to remove prior to primer & painting. Heat and a scrapper being careful not to scrap too hard on the roof as score lines can be see on the outside followed by Autosmart Tardis to remove the excess.

cheers :thumbup1:, must be single skin then the roof.
 
Noticed a knocking when purchasing the car. After a quick investigation the aftermarket exhaust was banging up against the Rear diffuser carrier bracket so this came off and was cut and modified to prevent the exhaust from coming into contact with the bracket. The exhaust will be changed over to a new original Cup Racer but this was essential to do and saved a few grams too.

Picture showing it after being modified:

IMG_7829.jpg


Holes cut out the floor and area prepped (sanded) ready for welding eye-bolt brackets to the floorpan.
These are located under both driver & passenger's seats to allow anti-sub belts to be mounted as part of the 6 point harness.

IMG_8350.jpg


OMP Seats that came with the car were Sold and replaced with Recaro SPA, weighing only 2.6kg each before mounts.

Saving is just over 5KG including current mounts which will also eventually go:

IMG_7913.jpg

IMG_7914.jpg
 
Genuine X85 Cup Racer Chassis purchased for salvaging parts to transfer onto the road version Clio Sport 197 Project race car.

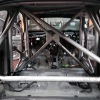
The main part to be transferred was the Genuine Renault Sport factory multipoint structural roll cage. Roll cage originally manufactured by Matter and has its Renault Sport Build number to confirm its authenticity.

I wanted to keep its originality so the Genuine Cup Racer cage was chosen.


Cup Racer shell prior to cage disassemble:
IMG_8155.jpg

IMG_8156.jpg


Cage disassembled & dash bar cut (as not needed) to allow removal as the factory Cup cage is assembled & welded inside the car in the factory prior to delivery to its customer.
IMG_8211.jpg


Rear section of cage came out without cutting but windscreen on both Cup racer and road car broke as it was a super tight fit.
IMG_8214.jpg


Cage was taken out the vehicle. Full paint strip & clean, exposed dash/ bulkhead bars cut back joints ground flush.

Next up... Cage install into road legal race car.
 
Last edited:
Pics below show cage fully stripped back and installed using custom made plates welded to the floor to MSA standards to allow it to be suitable for racing.

All 4 plates I made delicate mock ups out of 3mm card before being fabricated in steel to ensure the correct height & clearance taken as a carbon copy from the Cup Racer.

Plates were fabricated with nuts welded to the back of the plates (like the Original RS items) before being welded to the floor on all 4 points to allow the cage to still be bolted keeping its originality.

IMG_8337.jpg


Quite a lot of work had to be done to the front dash area where the front bars fit beside the A pillar. Very tight but a 'perfect' fit after cutting essential parts away to enable it to fit.

IMG_8597.jpg

IMG_8593.jpg

IMG_8594.jpg
 
Last edited:
Painting

Entire interior and cage prepped with Abrasive Nylon Web pads to allow primer and paint to adhere finished with tack cloth using Isopropyl Alcohol to complete prior to painting.

Etch Primer applied to Roll cage to allow the paint to adhere to the areas where steel was exposed and standard Grey Primer to all other areas within the cabin which had no/ little paint or undercoat:


IMG_8655.jpg

IMG_8659.jpg

IMG_8660.jpg

IMG_8642.jpg


DONE
IMG_8679.jpg


IMG_8877.jpg
 
In removing the cage you haven't damaged/cut any of the tubes have you, as if you've cut anything other than the welds (which can be re welded) then the cut tube will have to be replaced. Generally the done thing is to replicate the original cage as it can be extremely difficult to remove a welded cage with out having to replace half of it anyway.
Just letting you know (if you don't already) if scrutineers find damage (even repaired damage) to the cage then you won't be racing.

YES, thanks for the concern but the bar that was originally cut was removed, replaced with an entire new re-shaped peice and re-welded in place.
As I say fitted to MSA standards by MSA Approved fitters, so no problems here. Appreciate the heads up thou.
 
the front part doesn't actually look like a genuine Cup racer cage (apart from it being modified to suit RHD) it has different shape of door bars and doesn't have Matter lettering, the paint job looks the bee's knees though.
this is how mine came out (and it didn't have to be cut to take out nor to put in the car)

attachment.php
 

Attachments

  • 2015-08-25 09.59.18.jpg
    2015-08-25 09.59.18.jpg
    97.3 KB · Views: 660
Last edited:
Looks nice!
It is indeed a genuine Cup Racer cage from a X85 Cup Car, no doubt about. Comes with its individual Renault Sport build number plaque. Matter of course confirmed themselves it is one of their own, despite it not having Matter etched on the drivers gusset plate. This is just a different & modified version.

Yes, yours has different door bars but you'll have noticed mine is dropped a little on door bars to allow and accommodate easier entry & exit into the driver & passenger seat.

You'll also notice mine has double door bars instead on a single diagonal on the passenger side (my driver's side). This was because the car was designed to take passengers out so this was modified as part of the Palmer Sport division.

Slightly different scenario for you as you only had one door cross bars to deal with but with cross bars on both side in my X85 Cup Racer it was impossible to remove without taking one piece out.

P.S interesting seeing you are using standard RS 197/200 gearbox.
 
Last edited:
Ok a little update before I get too lost with this. The car is nearly finished and got MOT'd few weeks back and passed. The vehicle is drivable and capable of a track day but around 70% finished to where I want it.

I have spend hundreds of hours on the car and loose days on simple tasks due to over engineering and perfecting the build. You cannot rush such a project and tbh it won't be seeing the track this year now with winter around the corner so have the whole winter to get things sorted!

So much has happened since the last post and I cannot physically mention everything I have done. I have tried to take pictures of the entire journey without it jeopardising my work.

Anyhow.. Some pics (picked from the hundreds taken:

Lexan Windows taken out, stripped back, disasembled, machine polished and repainted. Rear quarters didn't have any bonding or seals so water was getting through easily.
Rubber draught excluder was used after IPA used on the frame to degrease:

image.jpg

image.jpg

image.jpg

image.jpg


Genuine Aerocatches fitted front and rear.
image.jpg

image.jpg


Custom brackets machined up:
image.jpg

image.jpg


image.jpg

image.jpg


image.jpg

image.jpg

image.jpg

image.jpg