R27 1 month detail finally finished!!

Right it’s about time i put a thread up on the progress of my car, which really isn’t much.. Unlike most of you guys i like a standard looking car but my progress is in the detailing side of things.


I have been known locally to have slight OCD towards the condition of my cars and other toys i own but the aim of this thread and detail was to get the Clio to the standards that i want my Clio.


So it’s been two years since i bought the R27 and to be honest i have had a brilliant experience with it. Huge ups and some downs obviously! Recently i had a week to take off work from last year so this was going to be spent on detailing the Clio. This thread WILL be very picture heavy!


Sorry for the long winded images and read.


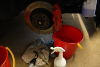
First off all was to wash the car, usual 2 bucket method..
IMG_1979.jpg


As you can see water has got under the carbon vinyl and lifted the corner a bit.
IMG_1953.jpg
IMG_1946.jpg


Wheels are in serious need of a refurb..
IMG_1940.jpg


Everything agitated with APC cleaner..
IMG_1961.jpg
IMG_1960.jpg
IMG_1963.jpg
IMG_1971.jpg
IMG_1983.jpg
 
Last edited:
Next onto claying the car. Quick trip down to Halfrauds to get some new Meg’s clay and AG Rapid Detailer (I originally wanted some Sonus clay and Dodo born slippy, but didn’t have time to order it!)


IMG_1959.jpg
IMG_1990.jpg


The contamination on the Clio was roughly like this the whole way round.. This was after the bottom back quarter.
IMG_1996.jpg


Interesting i found the most contamination down below the side F1 vinyl.
IMG_1997.jpg


Car was then taken into the garage and dried down (patting the paintwork) using a Polished Bliss drying towel. Ready for work.
IMG_2007.jpg


Once car was dried it was time to inspect the paintwork and condition (i take good care of my paint and was shocked to find it was rather cloudy. I knew it was starting to cloud but this upset me.
IMG_2013.jpg
IMG_2014.jpg
So time to try out a paint cleaner i got free when i was last up to Polished Bliss
IMG_2021.jpg


Applied with a Meg’s application pad
IMG_2020.jpg
 
So next onto a few things i wanted to sort out.. First the car is on axlestands and wheels have disappeared.


IMG_2026.jpg


Next up was removing the bumper. I have done this a few times now and is pretty straight foward.
IMG_2032.jpg
IMG_2035.jpg


First thing i wanted to do was check my arches because i was aware that i had broken an arch liner after hitting a large puddle at 60mph late one night. As you can see i had put some duct tape on it just to keep it secure for a week.
IMG_2038.jpg
IMG_2037.jpg
IMG_2042.jpg


Next up was the removal of front and rear diamonds, my task was to remove the carbon film and return back to normal.
IMG_2030.jpg
IMG_2033.jpg


After i had done all that i wanted to protect them a little and make them shine since they had a bit of grime on them. First i cleaned them with APC and then waxed them with Nattys Blue
IMG_2083.jpg


Also when i removed my bumper and looked at the passenger arch i noticed this little tube.. What the heck is it?
IMG_2092.jpg
 
Last edited:
So i had some spare time on my hands so i grabbed my sisters car and headed up to polished bliss after dropping something off somewhere (you will see later) and this is what i came back with.


Very happy man!! I had a problem with the spray nozzle on the R222 but they sent out a replacement and it still didn’t work so i got both nozzles back a new bottle and a replacement nozzle all f.o.c! Clark and the guys are brilliant!


IMG_2043.jpg


Next up was to clean up my engine bay, it had been neglected for a few months (very unlike me).


So a dilution ratio of 10:1 of Megs APC and a medium sized brush i got cracking cleaning it all up.


Before:
IMG_2066.jpg
IMG_2063.jpg
IMG_2062.jpg
IMG_2059.jpg
IMG_2064.jpg


After:
IMG_2073.jpg
IMG_2071.jpg
IMG_2070.jpg
IMG_2069.jpg
IMG_2098.jpg
 
Next up was the Calipers, they were feeling sorry for themselves!


Before:


As you can see the mechanics so fitted my new rear pads left something on them!!
IMG_2056.jpg
IMG_2055.jpg

After spraying all my callipers with R222 wheelcleaner i got to work with another set of brushes and a few microfibers.


IMG_2044.jpg


Doing its job..
IMG_2047.jpg


After many sprays and cleaning
IMG_2049.jpg


In the background you will also see a white bottle that has basically straight bilberry to help
IMG_2051.jpg


Now all calipers were waxed with Nattys blue but i only have front two images (two coats were applied)
IMG_2087.jpg
IMG_2086.jpg
 

Attachments

  • IMG_2056.jpg
    IMG_2056.jpg
    32.4 KB · Views: 0
  • IMG_2055.jpg
    IMG_2055.jpg
    27.8 KB · Views: 0
  • IMG_2044.jpg
    IMG_2044.jpg
    41.8 KB · Views: 0
  • IMG_2047.jpg
    IMG_2047.jpg
    37.6 KB · Views: 0
  • IMG_2049.jpg
    IMG_2049.jpg
    19.4 KB · Views: 0
So now that task has been taken care of.. onto my dreaded arches!!


This is everything i will use (i know it looks like im using the same brush but trust me im not! I get bulk orders of them for rougher jobs like these!


IMG_2106.jpg


Not any before images but they were pretty disgusting but here is my passenger front back half of my arch. The below are taken during:
IMG_2104.jpg
IMG_2103.jpg
IMG_2102.jpg
IMG_2085.jpg


Drivers back half of arch
IMG_2088.jpg


Finished and coated with tyre gel (i ran out of Megs last touch)
IMG_2112.jpg
IMG_2111.jpg


The streaks are just from the sponge and the gel.
IMG_2110.jpg
IMG_2108.jpg
 
So next up was the dreaded machine polishing task! My aim here was to correct the minor swirling that was appearing. Scratches wasn’t a problem for me as they are very light and not noticeable.


Just before i did this, i had cleaned some scratches which look to be caused by seagulls and some minor stone chips with official Renault paint..
IMG_2181.jpg


So being used is a Kestrel DA, Mernz Power Finish cutting compound and a large and smaller cutting pad. I did attempt a softer cutting pad but didn’t cut as much as i wanted it to, so the harder pad was needed.


IMG_2114.jpg


There were no pictures taken during this process as it did my freaking head in and i just wanted it finished to be honest.


So after the whole car was finished i put my wheels back on after returning from a refurb. I used a guy from Newburgh (15 miles from Aberdeen) and i highly recommend him for my local guys. The colour is slightly darker than the R27 colour and also has a gold kind of tint in the light but i love them and the finish is fantastic!


IMG_2178.jpg
IMG_2179.jpg
IMG_2180.jpg
Back on her feet!
IMG_2183.jpg


So now onto final stages.. Out for a wash to get rid of all polishing left overs and stuff.
IMG_2189.jpg


You can see in this image the marks on the decal from the blue tape.
IMG_2194.jpg
IMG_2199.jpg


So now its time to try out my new snow foam lance and Hyper-Wash!
IMG_2202.jpg
IMG_2203.jpg
IMG_2205.jpg
IMG_2206.jpg


It was a few minutes in order for me to get the settings right, it was too thick, then too thin, then too thick. Lol! Still haven’t got it correct though!


But as you can see it is dwelling and looks very clean.
IMG_2207.jpg
IMG_2208.jpg


So out comes the Megs APC again and the new Raceglaze brushes for get rid of some little sticky marks and stuff.
IMG_2211.jpg


Everything was then agitated with the products
IMG_2212.jpg
IMG_2213.jpg


Door pillars done also.
IMG_2214.jpg
IMG_2216.jpg


2 bucket method done once again with a lambswool mit for paint and then 2 other buckets for the wheels with a Megs microfiber washmit.
IMG_2219.jpg


Beading without any wax or anything on paintwork
IMG_2221.jpg
IMG_2222.jpg


One happy man!
 
Back into its home to be dried.


IMG_2220.jpg


I also got curious and went back to see how clean the water from the bodywork was.. As you can see its just as clean as it was when i poured it!
IMG_2223.jpg
IMG_2225.jpg


Time to dry with my new Polished Bliss drying towel
IMG_2232.jpg


Everything was patted down dry and i then used my old drying towel to pat town the alloys and door shuts etc dry.


Thanks for your time and patience but this detail is still not finish, two weeks later.. I will update the thread this week with some more images and progress.


Thanks once again!
 
You've done a fantastic job there, thorough detail and the results show it was worth the effort!
 
You've done a fantastic job there, thorough detail and the results show it was worth the effort!

Thanks Ben, It's something i have been meaning to do for about a year so i thought it was time to get it done :smile: Car is looking brilliant just now but sitting with a coat of sealant on it at the moment.
 
I love reading this stuff on DW. Great job you're doing mate, keep it up!

Were you not tempted to go for black wheels for the stealth look? would look great imo.
 
Looks great.

I wish I had a garage big enough to detail in.

If I do it in the garage I can only do one side at a time and have to drive it out and turn it round to do the other.
 
Holy bl**dy moly!

You don't need "The Sign" you definately need a billboard, not just any billboard, one with neons all over it that can be seen from space. Not just space, but i'm talking inter-galaxy visible - 100 million light years away!